How to use a CNC shield step-by-step guide | With GRBL

Hello and welcome back. In this tutorial, we will learn how to use the CNC shield step by step. For that, I have used a 28BYJ-48 stepper motor and an A4988 stepper driver. Additionally, to control the CNC shield, I used the GRBL firmware, which provides optimal results. By the end of this tutorial, you will have a clear understanding of how to use the CNC shield.


What is the GRBL?
The GRBL firmware is an open-source, high-performance firmware that is compatible with various CNC machines. It is specifically designed for use with Arduino-based CNC systems and is widely regarded as one of the best firmware options available. We can use the GRBL firmware for sending the G-codes to the CNC shield. Even beginners can use it easily with the help of the GRBL library file. If you want to do CNC projects accurately and with precision, the GRBL firmware is a good choice.
Diagram of CNC Shield

CNC shield specifications
- Input voltage: 12-36V
- Motor drivers: Supports up to 4 stepper motors
- Stepper motor driver: Compatible with A4988/DRV8825 motor drivers
- Power supply: One terminal block is available for connecting the external power supply
- Pin headers: Expansion headers for adding additional functionality such as limit switches, end stops, and spindle control
- Compatibility: Compatible with the GRBL firmware and other popular CNC software
OK let’s do it step by step. The required components are given below.
- Arduino UNO board x 1 —Our Store / Amazon
- CNC shield x 1 — Amazon
- A4988 stepper driver x 1 — Amazon
- 28BYJ-48 stepper motor x 1 — Amazon
- Male to Male jumper wire x 1 — Our Store / Amazon
Disclosure: These Amazon links are Affiliate links. As an Amazon Associate, I earn from qualifying purchases.
Step 1
Firstly, identify these components.


Step 2
Secondly, connect the CNC shield to the Arduino UNO board.


Step 3
Thirdly, connect the A4988 stepper motor driver to the shield.


Step 4
Now, prepare the stepper motor wires using the pictures below. For that, I used a flat screwdriver.


Step 5
And then, connect the stepper motor connector to the X-axis connector.


Step 6
Next, provide an external 12v power supply to the shield. And then, connect the Arduino UNO board to the computer.


Step 7
Now, include the GRBL library in the Arduino IDE.
- GRBL library — Download


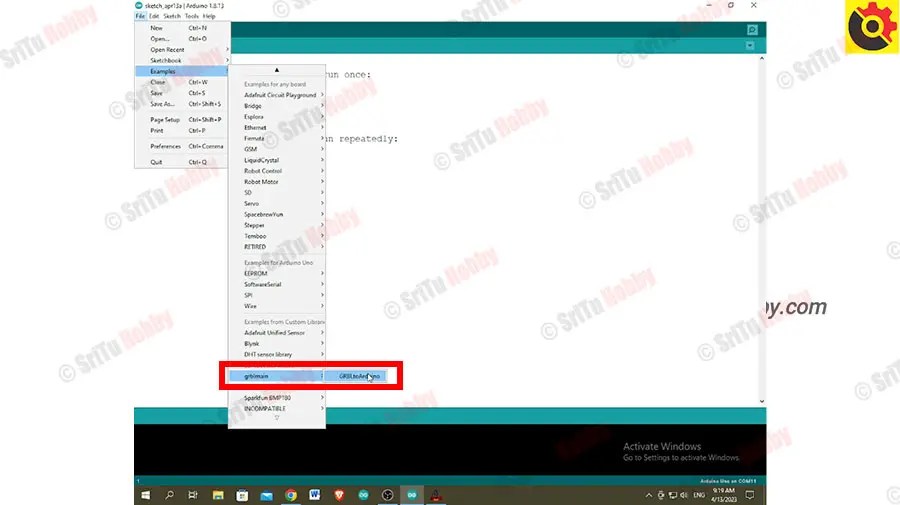
- Next, open the GRBL example. For that, use the picture below.
- Now, select the board and port. After, click the upload button.


Step 8
Finally, open the GRBL software and select the correct port. And then, click the open button. Now you can control the X-axis motor using the arrow buttons.
- GRBL Software — Download


Troubleshooting tips
- Check all connections.
- Check the stepper motor connector.
- Check your power source.
OK, enjoy this tutorial. The full video guide is below. We hope to see you in the next project or tutorial.
How to use a CNC shield step-by-step guide | With GRBL


