How to assemble a Thermometer and Humidity monitoring kit step by step

Hello and welcome back. In this tutorial, we will learn how to assemble a DIY thermometer and humidity kit step by step provided by OSEPP. It has an interesting design and we can measure the temperature and humidity values using this kit. The DHT11 sensor is used for that. That also is the main component of this kit. If you don’t have any knowledge of this sensor. You can use this link for that.
What is the DHT11 sensor and how does it work?
We can mainly use this sensor to measure temperature and humidity. Also, if you are looking for a low-cost sensor to measure temperature or humidity. This is a good solution. The DHT sensor family has two sensors. These are DHT11 and DHT22. This DHT22 sensor is slightly more expensive than the DHT11 sensor and is also has very high accuracy. Also, it is quite large in size. Both sensors include a thermistor, which measures temperature and humidity by measuring the ambient air. We can see these sensors below.

This kit includes a DHT11 sensor and we can see the temperature and humidity values from the LEDs.
You can buy this kit using this link – OSEPP
OK, let’s assemble this kit step by step.
Step 1
Firstly, unbox this kit and identify the components included in the kit.


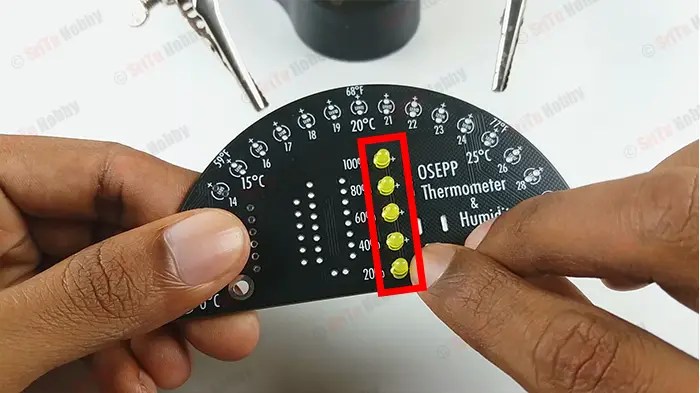
Step 2
Secondly, solder the LEDs that display humidity values. These LEDs are yellow.


Step 3
Thirdly, let’s solder the LEDs that display temperature values.
- First, solder five blue LEDs


- Second, solder eleven green LEDs to the PCB.


- Third, solder five red LEDs to the PCB.


Step 4
Ok, now solder the resistors to the PCB.


Step 5
Then, solder the IC and 100nF capacitor to the PCB.


Step 6
Next, solder the DHT11 sensor and DC jack to the PCB.


Step 7
Finally, assemble the stand of this kit. For that use the screws and plastic standoffs.


Step 8
Now, connect the power source to this kit. Use the power cable for that.


Ok, enjoy this project. So, see you in the next project.


